Solving Common Power Automate Problems with HTML Tables (Part 5)
")
Part 5 of 5
Intro
Power Automate allows Microsoft 365 users to automate tasks and streamline workflows across hundreds of applications. For beginners, navigating some of the capabilities can present challenges, especially when it comes to managing HTML tables. Throughout this series, we’ll solve the 5 most common challenges when using HTML tables in Power Automate.
‘Create HTML Table’ Action
We begin by creating an HTML table action in Power Automate. To see instructions for this, start by reading Part 1 linked here.
Problem 5: Custom HTML Links
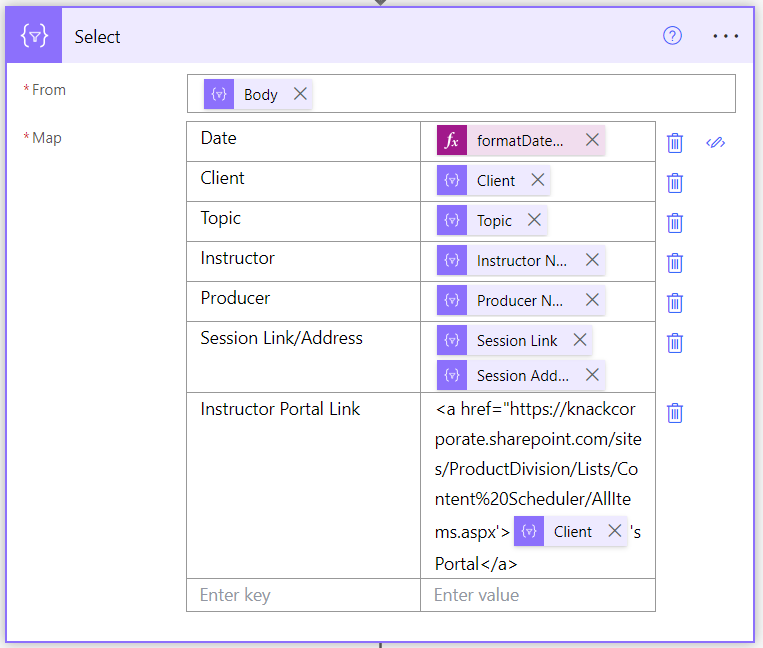
Unlike using HTML formatting within an email, you cannot add custom links by just using an “<a href=…” code within the Select action. This picture shows how you might typically add in a custom link.
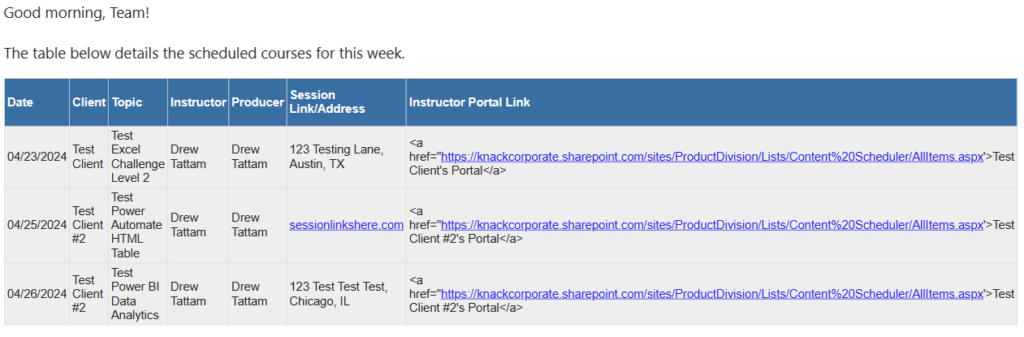
If you do this, you’ll end up with something that looks like the photo below and the link will not be functional.
If you want to have a custom link in your HTML table, you’ll need to update two things.
First, you’ll want to add a Concat function into your map in the select action.
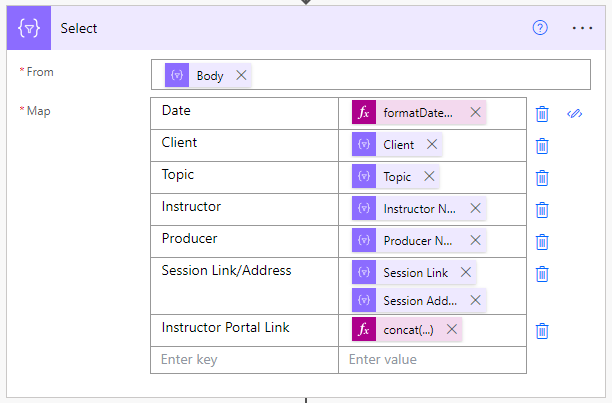
Use this function:
concat('<a href="', 'INSERT YOUR WEBSITE HERE’, '">', item()?['Client'], '</a>')Important Note: the item portion of the formula is a dynamic value from my Flow. You will also need to put the website link into this function. If your website link is a dynamic value too, you’ll want to format it like the item portion of the formula without single quotes around it.
Next, add another Compose action into the flow. I like to keep the two compose actions separate. Since one is for formatting borders/colors and the other is for content of my table I find it easier to come back and edit the flow when I need to if they’re separated. Below is a picture showing an overview of my Flow with both Compose actions.
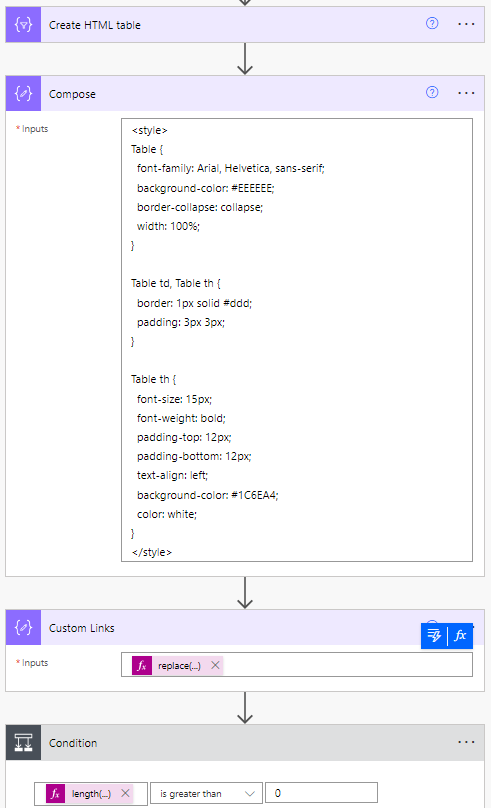
Copy and paste this replace function to utilize custom links:
replace(replace(replace(body('Create_HTML_table'),'<','<'),'>','>'),'"','"')Important Note: the body(‘Create… portion of the formula is a dynamic value from my Flow.

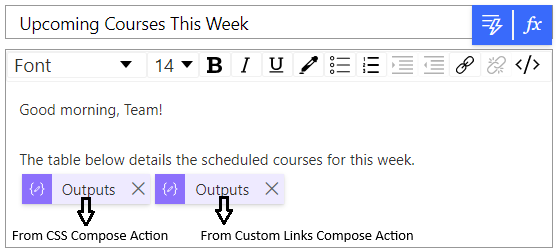
Reminder! You will need to update the second output in your email to be the output from this new compose action.
Now your email will have custom links in the table!

Summary
I hope this tip is useful next time you’re building a Flow in Power Automate that has an HTML table. If you’re not an existing Knack Training client and want to bring training like this to your company, you may be interested in our Power Automate training track! Download the informational one pager for the course track here and get in touch with us by filling out the form and a member of our team will reach out to you.
Related everyday office posts
Solving Common Power Automate Problems with HTML Tables (Part 1)
Part 1 of 5 Intro Power Automate allows Microsoft 365 users to automate tasks and streamline workflows across hundreds of...
Solving Common Power Automate Problems with HTML Tables (Part 2)
Part 2 of 5 Intro Power Automate allows Microsoft 365 users to automate tasks and streamline workflows across hundreds of...
Solving Common Power Automate Problems with HTML Tables (Part 3)
Part 3 of 5 Intro Power Automate allows Microsoft 365 users to automate tasks and streamline workflows across hundreds of...